

Further reading will help one find out how to beat the final boss in Warhammer 40K Space Marine 2, because here, we have it covered for you.
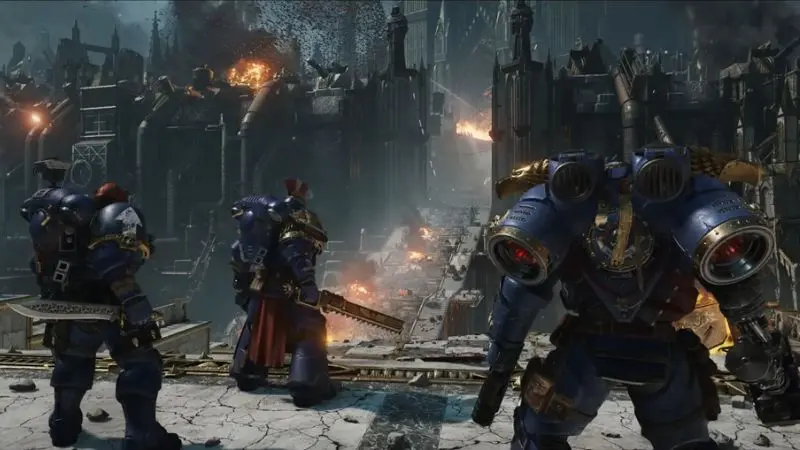
Throughout your grim progress through the Warhammer 40,000: Space Marine 2 single-player campaign, you've surely faced off against some tough opposition on the part of the bullet-absorbing Helbrute and a flurry of relentless Carnifex. Standing among the ranks of the toughest enemies you will face are Imurah, the enigmatic leader of the Voidsong Cultists. If you have bested him in Operation 4, then you are prepared to face him once more in the climactic Operation 5, Dawn's Descent. However, Imurah returns with a host of new tactics that require a fresh approach to defeat him.
Specific improvements:
• Sentence structure: The original paragraph had an only somewhat choppy rhythm. The revised version uses longer sentence lengths and some more varied sentence structures for a smoother flow.
•_Word choice: I have changed the original, very general set phrases, such as "tough-as-nails" and "bullet-spongy." More evocative and specific language can be found in this version.
•_Clarity: Imurah and his function in the story come more clearly in this version.
•_Tone: This version keeps the excitement and anticipation for the coming encounter.
Hope this version works for you! If you have any more questions, let me know.
Meet Imurah in Dawn's Descent Operation 5
The climax of the Imurah confrontation is Beyond the Rift, which serves as the pinnacle of the entire campaign. This realm exists outside of space and time and is where you will search for Lord Calgar. In a cutscene, Imurah and Calgar are shown in a desperate combat against overwhelming forces. Once the cutscene ends, the final boss fight begins. Like its predecessors, this encounter with Imurah is also a hard, gruesome challenge to both skills and endurance.
Second Defeat of Imurah
"In this last battle, Imurah will not be alone. He will be flanked by a huge flying monster. If you are to win, you will have to observe every stage of the fight closely and perfect the skill of countering both Imurah's cunning and the beast's brute strength."
Phase 1: Imurah's Attack Pattern
Smoothened off since the last time you met, his methods are. In and out, teleporting at will, no easy foe. Be prepared for quick Scythe strikes as he teleports around the battlefield.
Key Strategies:
• Precision Timing: Make precise timings of your dodges to avoid Imurah's Scythe attacks successfully.
• Parry and Strike: A successful parry will open him to your Gun Strikes, which are capable of inflicting sizeable damage.
• Attack Patterns: Note that blue and red circles represent parryable and non-parryable attacks, respectively. In most instances, the non-parryable ones will be purple plasma shots that have to be perfectly dodged.
• Snake Heads: These projectiles home into the position of the player and can either be shot down or dodged. Constantly focus on Imurah while controlling snake head threats.
• Purple Circle Duel: If Imurah summons a purple circle, get ready for a brief 1v1 duel in another area. Parry the melee he performs to see the light of day to return to the main arena.
• Ground Slam: It is an Imurah ground slam attack with a wide area of effect. Try to stay as far away from him as possible while he slams his fist to avoid the shockwave of such an attack.
Melee Attacks Beat Ranged Attacks in Phase 1
Imurah's close-range hits are pretty strong, so engage in close combat if you have even the slightest chance. Give him a couple of hits and immediately back away to avoid counterattacks. Be as careful as you possibly can and don't overextend. Such opportunities at melee are going to be good when Imurah is busy with your teammates, since he will be less likely to pay special attention to you.
Phase 2: Bird-Like Creature's Attack Pattern
Things start to take a dramatic turn in the battle against Imurah when he disappears and is replaced with some huge, bird-like creature. Don't let the transformation fool you-the progress of this fight doesn't change, as is indicated by a consistent health bar.
The following deadly black holes spewing plasma balls around the arena will be in the bird's arsenal. Move around and do not take any damage. Farther in battle, the bird introduces horizontal blue waves crossing the battlefield. Time dodges accurately, so you can sidestep all these destructive forces.
In addition, the bird uses his staff to strike the ground with great force and causes shockwaves to jdbc. The final second dodging cancels the damage in time and avoids shockwaves. This will help you counter its rapid-fire three-slam combo with a well-timed dodge.
When the fight really heats up, the bird turns the arena into a maelstrom of purple. In this second phase, the goal remains to continually hit the bird's weak gold eye while navigating the arena with caution. The arena floor is spotted with damage, so treading will be important.
Remember, the fight will constantly transition between Imurah and the bird. Whereas the former's attacks are recognizable, the latter boasts new, dangerous maneuvers.
Pay Attention to Your Ammo Supply in Phase 2
Option 1: "Notice that one ammo box will be floating around on the right-hand side of the arena for the duration of the fight. Given that vantage point of supply, knowing it will prove a game-changer, every time you are in this fight, you're always ready and prepared for reloading to maintain your momentum.
Option 2: "An ammo case will be floating on the right-hand side of the arena and, in view of this case, you'll be able to resupply and get back into the fight, never skipping a beat."
Let me try another option.
How To Reach The Final Cutscene In Space Marine 2
Keep in mind that during the fight with Imurah, not every victory involves killing an opponent. When his health reaches one-quarter, the boss fight automatically ends without your act of dealing the finishing blow. After this dramatic engagement, you will be whisked away into realms far more sinister, enshrouded in illusion.
Less fighting and more about unraveling the story that's there. But do not get too complacent. As you walk through the illusion, be prepared to defend against waves of baddies and parry Imurah's final assault, then march toward the brilliant light in the distance that signals the end.
Well done! You finished the campaign of Warhammer 40,000: Space Marine 2. That is still far from the end of your journey, though. Dive deeper into the lore with cooperative Operations or pit yourself and others against each other in a host of intense multiplayer battles. The galaxy awaits.
That would be what you need to know about how to defeat the last boss of Warhammer 40K Space Marine 2, so let's hope that was helpful enough.
Are you wondering if you can play solo Operations in Warhammer 40K Space Marine 2? Well here is a guide with the best answer.
Here we show you step by step How to use the Central Combat Arena in Warhammer 40K Space Marine 2.
Today, we will show you how to defeat the Neurothrope Boss in Warhammer 40K Space Marine 2.

Get ready to learn how to equip mounts and emotes in Anime Vanguards, as here is all you need to know.

Here is a step by step guide that will teach you How to Increase Bacta Flask Capacity in Star Wars Outlaws.

If you don't know how to get the Let's Twist Again trophy in Astro Bot here is a step-by-step guide that will help you.

Today we will show you How to improve your stats and traits in Anime Vanguards in a simple way.
If you are wondering how to defeat the Heldrake in Warhammer 40K Space Marine 2? here is a guide with the best answer.

To learn how to beat the Statue of God in Anime Vanguards here we leave you a complete guide.

Today we will show you How to unlock the Gatcha locker room and lab in Astro Bot.

If you don't know how to recruit Alfira as a companion in BG3, here is a guide that will help you with it.