
Discover effective solutions to resolve the issue of no display after installing a new RAM on our website.
Title: Troubleshooting Guide: How to Fix No Display After Installing New RAMAre you excited about upgrading your computer's performance by adding new RAM, only to be met with the frustrating problem of no display? Don't worry! We understand how disheartening it can be to encounter this issue after a hardware upgrade. In this comprehensive guide, we will walk you through the troubleshooting process and provide you with helpful steps to resolve the no display problem after installing new RAM. So, take a deep breath and let's dive in to find a solution to this common issue.
1. Check Loose Cables:
The first step in troubleshooting the no display issue is to ensure that all cables inside your computer are securely connected. It's not uncommon for the act of installing new RAM to inadvertently loosen other cables or connections within the computer. A loose cable, particularly one related to the display, can indeed cause the no display problem. Start by carefully inspecting and reseating all cables, including those connecting the monitor to the computer, the power supply, and any other internal connections.
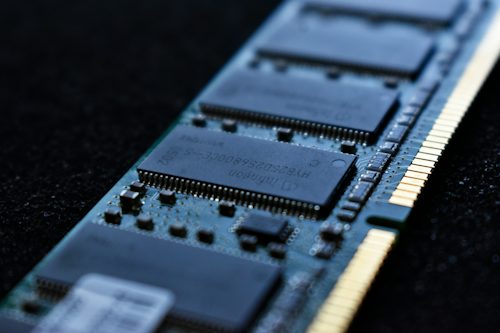
2. Verify RAM Compatibility:
One of the most common reasons for a no display issue after installing new RAM is compatibility problems. Double-check the specifications of the new RAM and compare them with your system's requirements. Ensure that the RAM module is compatible with your motherboard in terms of type, speed, and capacity. If the new RAM is not compatible, it can lead to various issues, including the no display problem. You can refer to your motherboard's manual or the manufacturer's website to verify the compatibility of the RAM.
3. Perform a Hard Reset:
Sometimes, a simple hard reset can work wonders in resolving display-related issues. Turn off your computer, unplug it from the power source, and then press and hold the power button for about 30 seconds to discharge any residual power. After this, plug in the power cable and turn on the computer to see if the display returns. A hard reset can help in clearing temporary hardware glitches and may resolve the no display problem.
4. Reset the BIOS:
The BIOS (Basic Input/Output System) settings play a crucial role in the functioning of your computer's hardware components, including the RAM. If the BIOS settings are not properly configured to accommodate the new RAM, it can lead to compatibility issues and result in the no display problem. To reset the BIOS settings, you can refer to your motherboard's manual for specific instructions. Typically, this involves accessing the BIOS menu during the boot process and selecting the option to reset to default settings or clearing the CMOS (Complementary Metal-Oxide-Semiconductor) memory.
5. Boot with One RAM Stick:
In situations where the no display issue persists after installing new RAM, it's essential to isolate potential causes. Remove all but one of the new RAM sticks and try booting up your computer. If the display returns with only one RAM stick installed, it could indicate that one of the RAM sticks is faulty. In such cases, you can systematically test each RAM stick individually by inserting them one at a time to identify if a particular module is causing the problem.
6. Clean RAM Slots:
Over time, dust and debris can accumulate in the RAM slots, leading to poor connections between the RAM sticks and the motherboard. Before reseating the RAM, it's a good practice to carefully clean out any dust or debris from the RAM slots. You can use a can of compressed air or a soft brush to gently remove any buildup within the slots. Ensure that the RAM slots are completely dry before reinserting the RAM sticks.
7. Check Display Cable:
While focusing on internal components and hardware, it's important not to overlook the external connections, particularly the cable that connects your display to the computer. A damaged or loose display cable can result in the no display problem. Ensure that the display cable is securely connected to both the monitor and the computer. If possible, try using a different display cable to rule out any issues related to the cable itself.
8. Listen for Beep Sounds:
When you power on your computer, listen for any beep sounds emanating from the motherboard. These beep codes can provide valuable insights into the nature of the problem. Different patterns of beeps correspond to specific hardware issues, and deciphering these codes can help in identifying the root cause of the no display problem. Refer to your motherboard's manual or the manufacturer's website to interpret the beep codes and understand what they indicate about your system's status.
9. Disconnect External GPU (if applicable):
If you have an external GPU (Graphics Processing Unit) installed in your system, it's worth considering whether it might be contributing to the no display issue. Temporarily disconnect the external GPU and try booting up the computer using the integrated graphics (if available). In some cases, conflicts between the new RAM and the external GPU can lead to display-related issues. By removing the external GPU from the equation, you can assess whether it has any impact on resolving the no display problem.
Encountering a no display problem after installing new RAM can be frustrating, but it's important not to panic. By following the troubleshooting steps outlined in this guide, you can systematically identify and address the underlying causes of the issue. Remember to approach each step calmly and methodically, allowing sufficient time to test and observe the results. Additionally, seeking assistance from the manufacturer's support resources or online communities can provide valuable insights and solutions specific to your hardware configuration.
"
We hope that this guide has provided you with the guidance and confidence to tackle the no display issue after a RAM upgrade. Remember, patience and persistence are key as you work towards resolving the problem and enjoying the benefits of your upgraded system. With a methodical approach and the right troubleshooting steps, you can overcome the no display problem and get back to using your computer with enhanced performance and reliability. Good luck, and may your computer display shine brightly once again!
If you are a PC user and you are wondering How to fix You cannot increase the speed or frequency of the RAM, you are in the right place, because here we will tell you how to fix it.
Read carefully so that you can learn How to fix reset RAM to boot every time, so that in this way you can solve the problem of your PC.

Discover how to easily adjust the default Zoom level in Microsoft Edge for a more personalized browsing experience.

Resolve OneDrive Error Code 0x80040c82 with our comprehensive troubleshooting guide.

Resolve OneDrive Error Code 0x8004de81 with our comprehensive troubleshooting guide.

Get your Twitch stream back on track with our expert tips and tricks to fix the loading issue.

Discover how to easily adjust the default Zoom level in Chrome for a more personalized browsing experience.

Get expert guidance on resolving Intel Killer Driver installation and other errors efficiently with our comprehensive website.

Resolve Vanguard error code KADENA – KEESLER with expert guidance and troubleshooting tips on our website.
Troubleshoot and resolve ASUS Bluetooth connectivity issues on Windows 11 with our comprehensive guide.