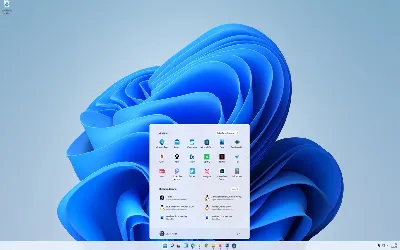
Learn how to enable Hyper-V in Windows 11 with our step-by-step guide. Improve your virtualization experience and run multiple operating systems on your PC.
Hyper-V is a virtualization technology that allows users to run multiple operating systems on a single host machine. This technology has become increasingly popular over the years, and Windows 11 has made it easier than ever to enable Hyper-V on your system. In this blog post, we will guide you step-by-step on how to enable Hyper-V in Windows 11.
System Requirements
Before enabling Hyper-V in Windows 11, it's important to check if your system meets the minimum requirements. Here are the minimum system requirements for enabling Hyper-V in Windows 11:
- A 64-bit processor with second-level address translation (SLAT)
- A minimum of 4 GB of RAM
- A minimum of 64 GB of storage
- A CPU with at least four cores
To check if your system meets the requirements, follow these steps:
1. Press the Windows key + R to open the Run dialog box.
2. Type "msinfo32" and hit enter.
3. Look for the "Hyper-V Requirements" section and check if all the requirements are met.
If your system meets the requirements, you can proceed with enabling Hyper-V in Windows 11.
Enabling Hyper-V in Windows 11
Here are the steps to enable Hyper-V in Windows 11:
- Step 1: Open the Control Panel
Click on the Start button and search for "Control Panel." Click on the Control Panel app to open it.
- Step 2: Click on "Programs and Features"
In the Control Panel, click on "Programs and Features."
- Step 3: Click on "Turn Windows features on or off"
In the "Programs and Features" window, click on "Turn Windows features on or off" from the left-hand side panel.
- Step 4: Check the box next to "Hyper-V"
In the "Windows Features" window, scroll down and check the box next to "Hyper-V."
- Step 5: Click "OK" and wait for the installation process to complete
Click on "OK" to enable Hyper-V in Windows 11. The installation process will start, and it may take a few minutes to complete.
- Step 6: Restart your computer
After the installation process is complete, you will be prompted to restart your computer. Make sure to save any unsaved work before restarting your computer.
Testing and Verifying Hyper-V
To test and verify if Hyper-V is enabled on your system, follow these steps:
1. Press the Windows key + R to open the Run dialog box.
2. Type "virtmgmt.msc" and hit enter.
3. If Hyper-V is enabled, the Hyper-V Manager will open.
If you face any issues while enabling Hyper-V, here are some common issues and their solutions:
- If you get an error message saying "Hyper-V cannot be installed. The processor does not have required virtualization capabilities," your processor may not support SLAT. In this case, you cannot enable Hyper-V.
- If you get an error message saying "The Hyper-V role cannot be installed on Windows 11," make sure that your system meets the minimum requirements for enabling Hyper-V.
- If you get an error message saying "Hyper-V cannot be installed. The processor does not support second-level address translation (SLAT)," your processor may not support SLAT. In this case, you cannot enable Hyper-V.
Enabling Hyper-V in Windows 11 is a straightforward process, and it can greatly enhance your computing experience by allowing you to run multiple operating systems on a single host machine. Follow the steps mentioned in this blog post to enable Hyper-V on your system and start using this powerful virtualization technology.
Discover how to effectively use Gemini Code Assist in Windows 11 to enhance your coding experience
Learn how to rebuild the Boot Configuration Data (BCD) file in Windows 11 with our step-by-step.
Fix persistent drive errors in Windows 11 after rebooting. Discover effective solutions to troubleshoot and repair your system for optimal performance.

"Learn how to easily fix Spotify Error Code 18 with our step-by-step guide. Say goodbye to frustrating error messages and start enjoying your music seamlessly. Get back to your favorite tunes in no time."

Learn how to connect Spotify to your Alexa device and enjoy your favorite music hands-free. Our step-by-step guide will walk you through the process and have you jamming out in no time.

"Secure your WhatsApp conversations with ease. Learn how to enable chat lock on your iOS or Android device with our step-by-step guide and keep your chats safe from prying eyes."

Looking for a way to enhance your Minecraft experience? Learn how to download and install Minecraft mods APK on Jojoy with our step-by-step guide. Discover the best mods available and take your game to the next level.

learn How to Fix OneDrive’s "The Tag Present in the Reparse Point Buffer Is Invalid" Error

Learn how to fix the Steam Cloud Error in Windows. This step-by-step guide will help you troubleshoot and resolve the most common causes of the error, such as corrupted game files, outdated Steam client, or network issues.

Our step-by-step guide on how to fix screen flickering and flashing on Windows 11 will help you get back to work without any interruptions. Check it out now!

Want to make sure your Windows 11 is running smoothly? Learn how to check the health of your Windows 11 with our simple guide.

